Pages

martedì 30 settembre 2014

Occhi Manga per Amigurumi in 5 step | Manga eyes for Amigurumi Tutorial


Salve a tutti! Come promesso ecco un tutorial che vi aiuterà a realizzare con soli 5 passi degli occhi in stile manga semplicissimi per i vostri amigurumi!
Che ne pensate?
Fatemi sapere J

Hi! Do you want to make manga eyes for your Amigurumi dolls? Follow this tutorial and you’ll get your manga eyes in only 5 steps!
What do you think about it? Let me know J

Se vi interessa restare aggiornati seguite il blog e mettete un "mi piace" alla mia pagina Facebook: Le Arti di Minerva

Clicca qui per Facebook


If you want to keep up to date follow the blog and like my Facebook Page: Le Arti di Minerva

Click here to go to my Facebook


venerdì 26 settembre 2014

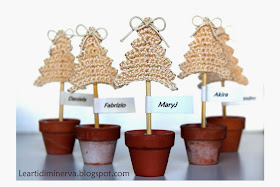
Albero di Natale all'uncinetto | Crochet Christmas tree


Salve a tutti! Come promesso, oggi vi propongo un tutorial per realizzare questi semplicissimi alberi di Natale all’uncinetto! Si realizzano in pochissimi minuti e sono davvero molto versatili!

Hi! As I promised, here is the tutorial about crochet Christmas tree! They are very fast to make and adaptable!


Io ne sto creando decine! Alcuni da usare come decorazioni natalizie per l’albero, con altri ho creato dei segnaposto per abbellire le tavole natalizie.

I’ m making tens! I will use some of them as Christmas ornaments, with some trees I made cute placeholders .


Carini, vero?

They are nice, aren’t they?

Gli stessi alberelli li uso anche per chiudere i pacchetti natalizi in cui consegno gli ordini e i regalini.

I use these crochet  trees also on my gift boxes!


Se vi interessa restare aggiornati seguite il blog e mettete un "mi piace" alla mia pagina Facebook: Le Arti di Minerva

Clicca qui per Facebook

If you want to keep up to date follow the blog and like my Facebook Page: Le Arti di Minerva

Click here to go to my Facebook


Fatemi sapere se il tutorial vi è piaciuto e soprattutto come userete i vostri alberelli!

Let me know it you enjoyed the tutorial and how you are going to use your trees!


Mi avete richiesto anche uno schema scritto ed eccovi accontentate

Someone asked for a written pattern so, here it is


SCHEMA ITALIANO

Avviare 11 catenelle
Giro 1 : 9 mb, 3 mb nell’ultima cat, 1 cat, gira il lavoro
Giro 2: 9 mb, 3 mb nello stesso punto (*quello successivo all’ultima maglia bassa realizzata), 1 cat, gira il lavoro
Giro 3: 8 mb, 3 mb nello stesso punto*, 1 cat, gira il lavoro
Giro 4: 7 mb, 3 mb nello stesso punto*, 1 cat, gira il lavoro
Giro 5: 6 mb, 3 mb nello stesso punto*, 1 cat, gira il lavoro
Giro 6: 5 mb, 3 mb nello stesso punto*, 1 cat, gira il lavoro
Giro 7: 4 mb, 3 mb nello stesso punto*, 1 cat, gira il lavoro
Giro 8: 3 mb, 3 mb nello stesso punto*, 1 cat, gira il lavoro
Giro 9: 2 mb, 3 mb nello stesso punto*, 1 cat, gira il lavoro
Giro 10: 1 mb, 1mma - 3 cat - 1 mma nello stesso punto, 1 mb, 1 maglia bassissima.


ENGLISH PATTERN

11 chains
Round 1: 9sc, 3 sc in the last chain, 1 chain, turn
Round 2: 9 sc, 3 sc in the same stitch (*the next to the last sc), 1 ch, turn
Round 3: 8 sc, 3 sc in the same stitch *, 1 ch, turn
Round 4: 7 sc, 3 sc in the same stitch *, 1 ch, turn
Round 5: 6 sc, 3 sc in the same stitch *, 1 ch, turn
Round 6: 5 sc, 3 sc in the same stitch *, 1 ch, turn
Round 7: 4 sc, 3 sc in the same stitch *, 1 ch, turn
Round 8: 3 sc, 3 sc in the same stitch *, 1 ch, turn
Round 9: 2 sc, 3 sc in the same stitch *, 1 ch, turn
Round 10: 1 sc, 1 hdc – 3 ch – 1 hdc in the same stitch, 1 sc, 1 slip stitch


mercoledì 24 settembre 2014

Bambolina Amigurumi | Christmas doll amigurumi


Salve a tutti! Vi presento la mia ultima creazione: una bambolina per Natale! 
Non è deliziosa? 

Hi everyone! I introduce to you my most recent Amigurumi!
She is lovely, Isn't she?


E' la prima bambolina che realizzo e mi ritengo soddisfatta, è molto simile all'idea che avevo in testa e nonostante abbia impiegato svariati giorni a progettarla e realizzarla, sono contenta del risultato!

This is the first amigurumi doll I crochet and I m really happy because she is really similar to my starting idea!

Ho usato filato cablé n° 5 ed uncinetti da 1,5 e 2 mm per realizzarla!

I used cotton n° 5 and 1,5 mm and 2 mm hooks to make her.


La bambolina è senza cuciture, Ho realizzato prima le gambe e le braccia e poi le ho incorporate al resto! Di seguito vi lascio qualche dettaglio in più sullo schema. 
Se vi interessa sapere come ho fatto gli occhi e i capelli, scrivetemi pure! Se possibile, al più presto girerò dei video tutorial sull'argomento!

This doll is seamless. I made before legs and arms and after I incorporated them to the body. You'll find more details reading the pattern!
If you want to know how I made hairs and eyes contact me. As soon as possible, I ll make a video tutorial about it.


Per sapere come ho realizzato gli occhi in stile manga clicca qui:


For the tutorial about manga eyes click here:


Lo schema del cappello lo trovate qui: Babbo Natale Amigurumi

You can find Santa's Hat Pattern here: Santa Claus Amigurumi


To see how I make amigurumi hairstyle click here: how to attach hair to amigurumi dolls


Se vi interessa restare aggiornati seguite il blog e mettete un "mi piace" alla mia pagina Facebook: Le Arti di Minerva

Clicca qui per Facebook

If you want to keep up to date follow the blog and like my Facebook Page: Le Arti di Minerva

Click here to go to my Facebook


SCHEMA ITALIANO


Abbreviazioni:

Mb: maglia bassa
Ma: maglia alta
Mma: mezza maglia alta
Aum: 2 mb nello stesso punto
Dim: 2 mb chiuse insieme
Cat: catenella

GAMBE (x 2) uncinetto da 2mm

Con il cotone ROSSO:
Giro 1: 6 mb nel cerchio magico (6)
Giro 2: 6 aum (12)
Giro 3: 1 mb, 1 aum. *Ripetere fino alla fine del Giro (18)
Giro 4: 1 mb lavorata in back loop in ogni punto (18)
Giro 5: 1mb in ogni punto (18)
CAMBIO COLORE à PELLE
Giro 6: 1 mb, 1 dim, *. (12)
Giro 7: 1 mb in ogni punto sottostante (12)
Giro 8: 2 mb, 1 dim, * (9)
Giro 9- 20: 1 mb in ogni punto sottostante (9)

 BRACCIA (x 2) uncinetto da 1,5 mm

Con il ROSSO :
Giro 1: 6 mb nel cerchio magico (6)
Giro 2: 1 mb, 1 aum. *Ripetere fino alla fine del Giro (9)
Giro 3-5: 1 mb in ogni punto (9)
CAMBIO COLORE à PELLE
Giro 6-15: 1 mb in ogni punto sottostante. (9)

CORPO uncinetto da 2 mm

Giro 1: Mettere le gambe vicine e lavorare a maglia bassa unendo i due pezzi con 18 mb
Giro 2: 1 mb in ogni punto sottostante. (18)
Giro 3: 2 mb, 1 aum. * (24)
Giro 4-9: 1 mb in ogni punto. (24)
Giro 10: 2 mb, 1 dim. * (18)
Giro 11- 12: 1 mb in ogni punto. (18)
Giro 13: Mettere un braccio accanto al corpo e cucire 4 maglie basse del braccio al corpo. (Farlo da entrambi I lati)
Giro 14: Eseguire maglie basse comprendendo le braccia al corpo, come fosse un unico pezzo
Giro 15: 1 mb in oni punto sottostante
Giro 16: Contare le maglie basse realizzate nel giro precedente e spargere gli aumenti o le diminuzioni necessari a raggiungere 30 mb.
Giro 17: 3 mb, 1 dim, * (24)
Giro 18: 2 mb, 1 dim, * (18)
Giro 19: 1 mb, 1 dim, * (12)
(COLLO)
Giro 19:  2 mb, 1 dim, * (9)
Giro 20- 21: 1 mb in ogni punto sottostante. (9)
(TESTA)
Giro 22: 9 aum. (18)
Giro 23: 2 mb, 1 aum. * (24)
Giro 24: 3 mb, 1 aum. * (30)
Giro 25-29: 1 mb in ogni punto sottostante. (30)
Giro 30: 3 mb, 1 dim. * (24)
Giro 31: 2 mb, 1 dim. * (18)
Giro 32: 1 mb, 1 dim. * (12)
Giro 33: 6 dim. (6)

VESTITO

Il vestito l’ho lavorato in 2 parti: ho creato prima la gonna, alla quale ho successivamente aggiunto la parte superiore.
Per la gonna:
IN ROSSO
Giro 1: 25 cat chiuse a cerchio con un punto bassissimo
Giro 2: 3 cat, 24 ma
Giro 3: 1 ma, 1 aum
Giro 4: 1 ma in ogni punto
Giro 5: 1 ma, 1 aum
CAMBIO COLORE à BIANCO
Giro 6 : 1 mma, 2 aum
Per la parte superiore
Davanti:
Giro 1: 9 mb agganciandoci alla parte superior della gonna
Giro 2- 4: 9 mb
Giro 5: 1mma, 2 ma nello stesso punto, 1mma, 1 mb, 1 mb, 1mma, 2 ma nello stesso punto, 1mma
Dietro:
Giro 1: A distanza di 4 punti dal davanti eseguire 9 maglie basse agganciandoci alla gonna
Giro 2- 5: 9 mb

Aggiungere dei laccetti alle estremità del davanti e del dietro e legarli con un fiocchetto

Per la SCIARPA ho lavorato 45 ma in BIANCO


ENGLISH PATTERN

Abbreviations:

Sc: single crochet
Dc: double crochet
Hdc:half double crochet
Inc: 2 sc in the same stitch
Dec: 2 sc together
Ch: chain

LEGS (x 2) 2mm hook

With RED yarn:
Round 1: 6 sc in a magic circle (6)
Round 2: 6 inc (12)
Round 3: 1 sc, 1 inc. *Repeat until the end of the round (18)
Round 4: 1 sc in back loop in each stitch (18)
Round 5: 1 sc in each stitch (18)
CHANGE COLOR à SKIN
Round 6: 1 sc, 1 dec, *. (12)
Round 7: 1 sc in each stitch (12)
Round 8: 2 sc, 1 dec, * (9)
Round 9- 20: 1 sc in each stitch (9)

 ARMS (x 2) 1,5 mm hook

With RED yarn:
Round 1: 6 sc in a magic circle (6)
Round 2: 1 sc, 1 inc. *Repeat until the end of the round (9)
Round 3-5: 1 sc in each stitch (9)
CHANGE COLOR à SKIN
Round 6-15: 1 sc in each stitch. (9)

BODY  2 mm hook

Round 1: Place one leg next the other and single crochet through both pieces with 18 sc.
Round 2: 1 sc in each stitch. (18)
Round 3: 2 sc, 1 inc. * (24)
Round 4-9: 1 sc in each stitch. (24)
Round 10: 2 sc, 1 dec. * (18)
Round 11- 12: 1 sc in each stitch. (18)
Round 13: Place the arms next the body and sew 4 arm’s single crochet to the body.
Round 14: Single crochet through all pieces (both arms and body)
Round 15: 1 sc in each stitch
Round 16: Count how many stitches you have made the round before and with some increase or decrease make 30 sc.
Round 17: 3 sc, 1 dec, * (24)
Round 18: 2 sc, 1 dec, * (18)
Round 19: 1 sc, 1 dec, * (12)
(NECK)
Round 19:  2 sc, 1 dec, * (9)
Round 20- 21: 1 sc in each stitch. (9)
(HEAD)
Round 22: 9 inc. (18)
Round 23: 2 sc, 1 inc. * (24)
Round 24: 3 sc, 1 inc. * (30)
Round 25-29: 1 sc in each stitch. (30)
Round 30: 3 sc, 1 dec. * (24)
Round 31: 2 sc, 1 dec. * (18)
Round 32: 1 sc, 1 dec. * (12)
Round 33: 6 dec. (6)

DRESS

I made the dress in 2 steps:
I crochet before the skirt and after I added the upper part.
For the skirt:
IN RED
Round 1: 25 chains closed in circle with slip stitch
Round 2: 3 ch, 24 dc
Round 3: 1 dc, 1 inc
Round 4: 1 dc in each stitch
Round 5: 1 dc, 1 inc
CHANGE COLOR à WHITE
Round 6 : 1 hdc, 2 inc
For the top
Front:
Round 1: 9 sc on the top of the skirt, 1 ch, turn
Round 2- 4: 9 sc
Round 5: 1hdc, 2 dc in the same stitch, 1hdc, 1 sc, 1 sc, 1hdc, 2 dc in the same stitch, 1hdc.
Back:
Round 1: Skip 4 sc from the front part and 9 sc on the top of the skirt, 1 ch, turn
Round 2- 5: 9 sc

Add some laces at the ends of the upper part of the dress and tie them arranging a bow

SCARF
In WHITE:
45 dc

sabato 13 settembre 2014

Santa Claus is coming to town... | Babbo Natale Amigurumi Free pattern


Salve a tutti! Oggi voglio proporvi lo schema del mio Babbo Natale Amigurumi!


Sarà un po' presto per parlare del Natale?
Probabilmente si, ma siccome io mi riduco a fare le cose sempre gli ultimi giorni, stavolta ho deciso di iniziare con laaaargo anticipo!

Hi! Today I want to share with you my first Santa Claus Amigurumi!
Do you think it's a bit early to talk about Christmas? Maybe you're right, but I prefer to get ready ahead of time! 


Cosa ne pensate?
Ho usato cotone cablé n°5 ed un uncinetto da 2 mm. L'amigurumi è alto circa 15 cm
Nei prossimi giorni posterò anche lo schema dell'alberello, quindi se vi interessa restare aggiornati seguite il blog e mettete un "mi piace" alla mia pagina Facebook: Le Arti di Minerva

Clicca qui per Facebook

Fatemi sapere se è tutto chiaro e mandatemi le foto dei vostri Babbo Natale!


What do you think about it?
 In the next days I'll post the little Christmas tree pattern! If you want to keep up to date follow the blog and like my Facebook Page: Le Arti di Minerva

Click here to go to my Facebook

Let me know if everything is undestandable and send me  the picture of your Santas!!!

Download Pattern Italiano

Download English Pattern

martedì 9 settembre 2014

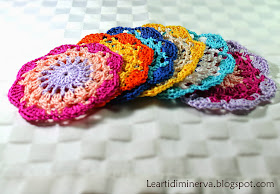
Sottobicchieri all'uncinetto | Crochet Coasters free pattern


Ho la fissa per i sottobicchieri!

Non ve l'avevo mai detto? Sicuro?
Ne ho di ogni forma e colore, ma non ne avevo ancora fatti all'uncinetto!
Qualche giorno fa mi sono messa all'opera e ne ho fatti di coloratissimi da abbinare ai miei bicchieri coloratissimi!


Cosa ne pensate? Carini, vero?
Li ho chiamati "happy coasters" tanta è l'allegria che portano in tavola!

Sono anche semplicissimi da realizzare!


Hi! I'm obsessed with coasters!!! Are you sure I never told you before? 
I have coasters in all shapes and colours, but I never crochet them before!
Some days ago I made these!


What do you think about them? Ther're really easy to make! 
I called them "happy coasters"


venerdì 5 settembre 2014

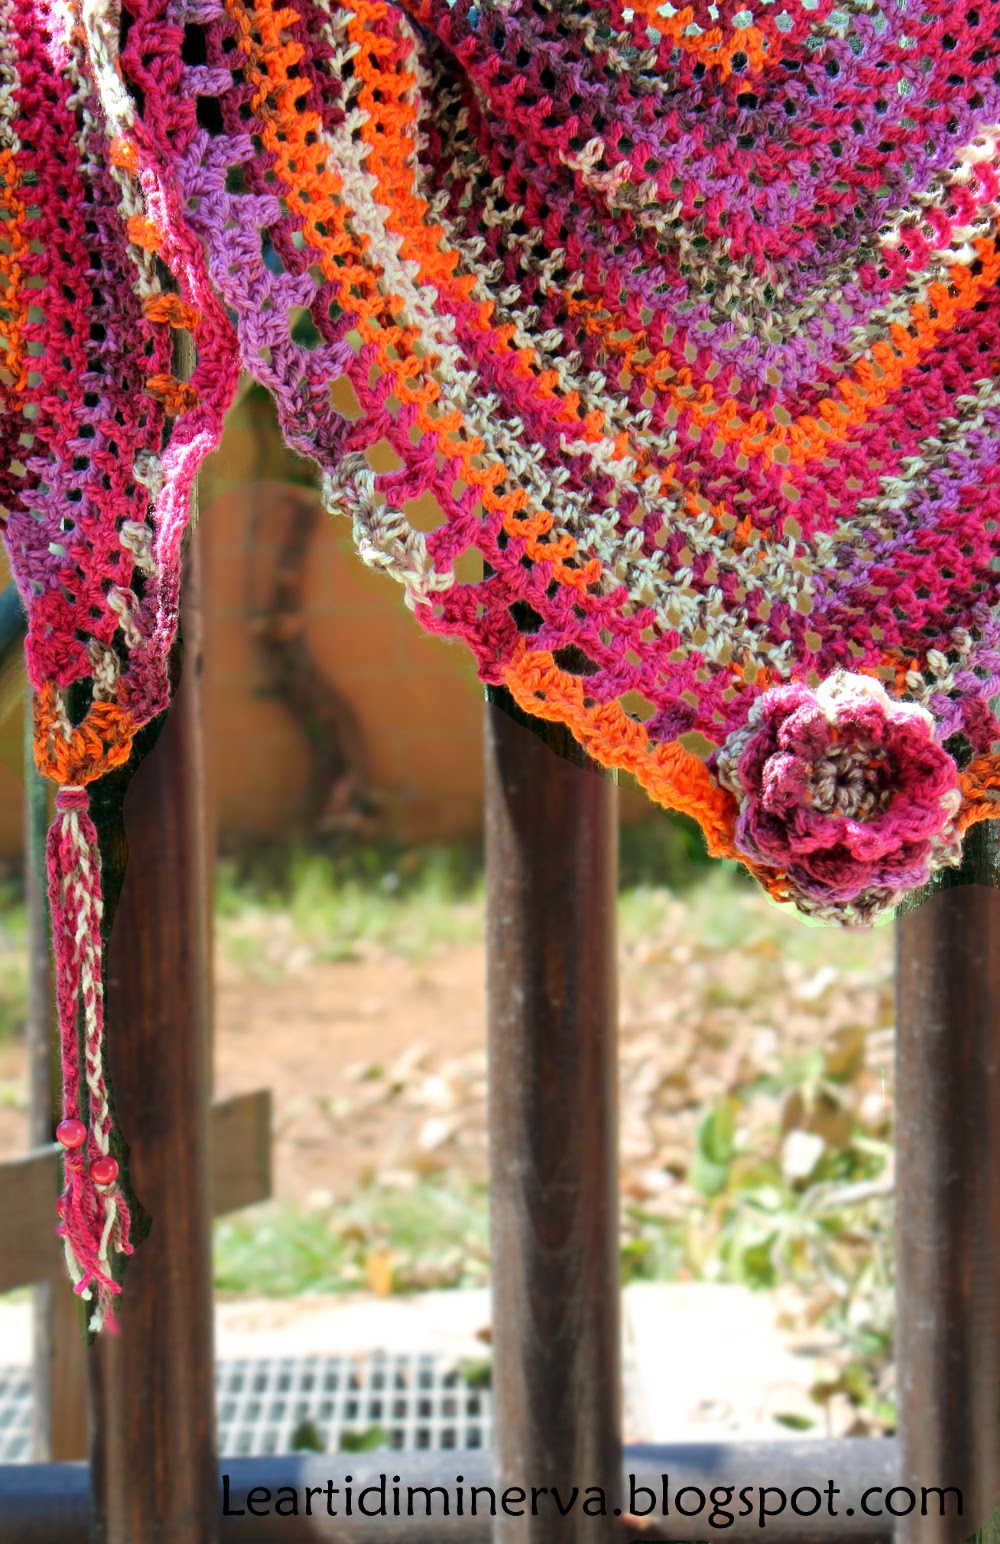
Sciarpa triangolare all'uncinetto | Triangle scarf crochet free Pattern

Salve a tutti! Sono rientrata da poco dalle vacanze estive e questa sciarpa triangolare all'uncinetto, complice anche l'aria fresca di questi giorni, è il primo progetto che ho terminato.
E' davvero semplicissima da realizzare, adatta anche ai principianti dato che i punti impiegati sono solo tre:

Cerchio magico
Catenella
Maglia alta


Che ve ne pare? Io personalmente l'adoro!

Per scaricare il pattern in PDF da salvare e/o stampare cliccate su "download pattern". E' il primo schema che "scrivo" attraverso i simboli ed è mezzo sbilenco, ma spero comunque sia chiaro. Se qualcosa vi sfugge lasciate pure un commento sotto al post oppure contattatemi sulla mia pagina Facebook "Le Arti di Minerva".

Download Pattern Italiano

Download English Pattern


Hi! I came back from summer Holidays and this triangle scarf is the fist project I finished.
It's really easy to make even for beginners as it's made with only 3 stitches:

Magic Ring
Chain
Double crochet


What do you think about it? I think it's lovely :D 
For the downloadable pdf file click on "Download pattern"

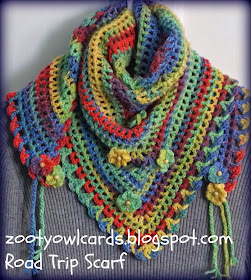
To make this beautiful scarf I got inspiration from some pictures on the web and one in particular:


You can find the pattern on Zooty Owl's Crafty blog: 

PS. Zooty Olw authorized me to publish her picture.


This is the first pattern I wrote with crochet symbols and it's a bit twisted, but I hope it's clear. If it's not, and you have doubts, leave a message or contact me on my Facebook : Le arti di Minerva.